|
Introduction
This document is meant as a brief introduction to the Java
2 Enterprise Edition. It is intended to provide a short, sharp and hands on
guide to getting going developing Enterprise Java solutions, it stems from my
disappointment with the documentation that comes with the reference
implementation. Note that this article discusses the reference implementation
provided by Sun Microsystems, the license of which prohibits commercial use.
What you'll need
To follow this article and develop and deploy the examples
you will need to have a machine with the following installed:
Java 2 Platform SDK Standard Edition (Java SDK)
http://java.sun.com/j2se/1.3/
Java 2 Platform Enterprise Edition (J2EE)
http://www.javasoft.com/j2ee/
I suggest you also download the documentation to accompany
each of the above.
Configuring your system
Once you have downloaded the above and installed them you
will need to navigate to the directory in which you installed the J2EE, and edit
the file bin\userconfig.bat, adding the following two lines (NOTE UNIX users I
currently only have a windows box at home so you'll have to adjust for UNIX):
set JAVA_HOME=c:\jdk1.3
set J2EE_HOME=c:\j2sdkee1.2.1
Though do remember to change the paths to actually match
where you have installed them. JAVA_HOME should reference the Java SDK, and
J2EE_HOME should reference the J2EE.
Now open a command prompt and navigate to your
J2EE_HOME\bin directory, and run userconfig.bat. If you get a message about
being out of environment space, right click on the command prompt title bar,
select Properties from the menu, then the Memory tab, and then set the initial
environment to 4096, and hit the OK button. You may need to restart your command
prompt before running the userconfig.bat again.
Once you have successfully executed userconfig.bat, it’s
time to run j2ee.bat (from the same directory). You should then end up with the
following displayed on the screen:
J2EE server Listen Port: = 1049
Redirecting the output and error streams to the following files:
c:\j2sdkee1.2.1\logs\scone\ejb\j2ee\system.out
c:\j2sdkee1.2.1\logs\scone\ejb\j2ee\system.err
J2EE server startup complete.
You J2EE Server is now up and running, you might like to
test it by starting a web browser and pointing it at http://localhost:8000 You
should then see something like the following:
|
|
| J2EE 1.2.1
|
| Default Home Page
|
|
|
| Congratulations!
|
| Viewing this page means that your Web Server has been installed correctly and is serving files properly.
|
|
|
| J2EE-ri-feedback@sun.com
|
|
|
|
NOTE if you open additional command prompts you may need to
run userconfig.bat in each before using the J2EE tools and batch files.
Building Enterprise Applications
For some reason most tutorials start at EJBs and work
forward to the client, instead I have chosen to start with the simpler, and more
immediately rewarding JSP (we all like to see stuff really working).
A First JSP
Firstly you should be aware what JSP's are, JSP stands for
Java Server Page. JSP is very similar to Microsoft’s ASP, in that it embeds
code within a HTML document. You can read more about JSP at http://java.sun.com/products/jsp/index.html.
Have a look at the following trivial example:
<html>
<head>
<title>JSP Test Page</title>
</head>
<body>
<%! String message = "Hello, World"; %>
The traditional greeting: <b><%= message %></b>
<body>
</html>
Save the above in the file JSPTest.jsp (for example)
and we can move onto deployment of your JSP.
Deploying your JSP
To deploy your software developed with the J2EE we use the
Application Deployment tool, which you can start by running deploytool.bat.
You’ll then be presented with this screen:
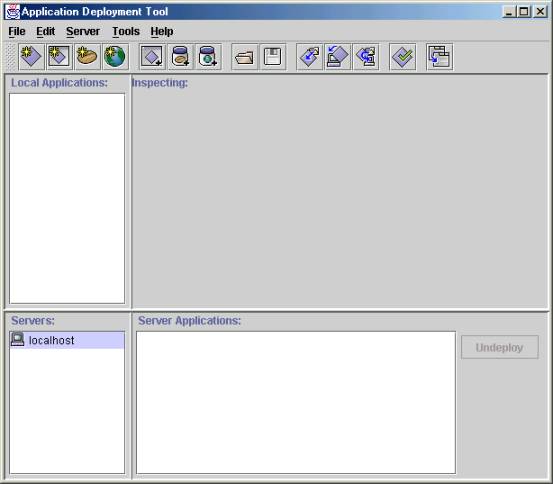
Figure 1 – Application Deployment Tool
From the file menu choose New Application and fill in the following dialog box with the relevant information:
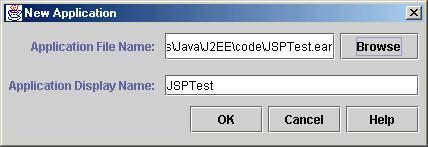
Figure 2 – New Application Dialog
Once you have done that again from the File menu choose New Web Component, which will present you with the following dialog box:
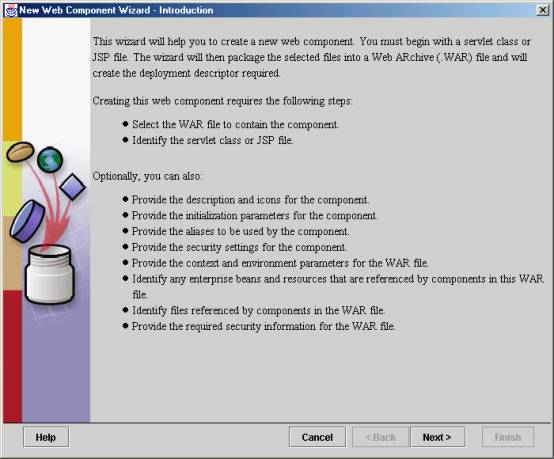
Figure 3 – New Web Component
So have a read, and then click Next, you’ll be presented
with a rather more complex screen on which you need to fill in the following
fields.
|
WAR Display Name
|
This is a friendly name for the WAR you are about to create. For example use JSPTestWAR
|
|
Contents
|
Click on Add, and use the wizard to get JSPTest.jsp listed in the contents.
|
Then click Next and change the Web Component Type to JSP, and click Next. On this screen you will need to select the JSP Filename, and type in a Web Component Display Name, I suggest TheJSPTest. Then click Finish.
Finally in the Local Applications treeview navigate to the
JSPTest application, then select the Web Context tab on the right, and edit the
context root to say JSPTestRoot. Finally go to the Tools menu and select Deploy.
Accept the default settings and deploy your JSP.
Lastly you’ll want to test it by opening http://localhost:8000/JSPTestRoot/JSPTest.jsp
in your favourite Internet browser. All being well you should see:
|
|
| The traditional greeting: Hello, World
|
|
|
|
A First Servlet
Servlets are an alternative to traditional CGI scripts. You can learn more at http://java.sun.com/products/servlet/index.html.
In the meantime here is a very simple example, I’ll explain what the code does in a later article.
The following is a basic example servlet:
|
import javax.servlet.*;
|
|
import javax.servlet.http.*;
|
|
import java.io.*;
|
|
|
| public class TestServlet extends HttpServlet
|
| {
|
| /**
|
| * Handle the HTTP GET method by building a simple web page.
|
| */
|
| public void doGet (HttpServletRequest request, HttpServletResponse response)
|
| throws ServletException, IOException
|
| {
|
| PrintWriter out;
|
| String title = "Test Servlet";
|
|
|
| // set content type and other response header fields first
|
| response.setContentType("text/html");
|
|
|
| // then write the data of the response
|
| out = response.getWriter();
|
|
|
| // write out the page
|
| out.println("<HTML><HEAD><TITLE>");
|
| out.println(title);
|
| out.println("</TITLE></HEAD><BODY>");
|
| out.println("<H1>" + title + "</H1>");
|
| out.println("<P>Hello, World.</P>");
|
| out.println("</BODY></HTML>");
|
| out.close();
|
| }
|
| }
|
which will need compiling with the following line:
|
javac -classpath %J2EE_HOME%\lib\j2ee.jar TestServlet.java
|
You’ll have to make sure J2EE_HOME is set for the command prompt you use to run the
command. You may also need to ensure Java is in your PATH, i.e.
|
set path=%PATH%;JAVA_HOME\bin
|
|
|
Deploying Your Servlet
Once again you will need to run Application Deployment Tool, then create a new application as we did for JSPTest previously, this time call it ServletTest. Then add a new Web Component. You will need to add the
TestServlet.class file, so click on Add in the contents pane, then click Next in the dialog it opens (make sure you add it as a Class file and not as a Content file). Then click Next, make sure Servlet is selected, and click Next again. Select TestServlet in the Servlet Class, enter a Web Component Display Name (I
used TestServlet again). Click Next twice, then Add and add the alias ServletAlias and click Finish.
Finally you can now deploy your application as you did for the JSP example. You should then be able to see the results by pointing your Internet browser to: http://localhost:8000/ServletRoot/ServletAlias
Enterprise Java Beans
Last but not least we’ll look at Enterprise Java Beans (usually referred to as EJBs). Each snippet below is from a file of the same name as the class or interface, as you would expect.
Remote Interface
|
|
|
import javax.ejb.*;
|
|
import java.rmi.*;
|
|
|
| public interface Hello extends EJBObject
|
| {
|
| String greet(String s) throws RemoteException;
|
| }
|
|
|
Home Interface
|
|
| import javax.ejb.*;
|
|
|
| public interface HelloHome extends EJBHome
|
| {
|
| public Hello create() throws java.rmi.RemoteException, javax.ejb.CreateException;
|
| }
|
|
|
The Bean Itself
|
|
| import javax.ejb.*;
|
|
|
| public class HelloBean implements SessionBean
|
| {
|
| SessionContext ctx;
|
|
|
| public void ejbCreate() {}
|
|
|
| public String greet(String str)
|
| {
|
| return "Hello " + str;
|
| }
|
|
|
| public void setSessionContext(SessionContext ctx)
|
| {
|
| this.ctx = ctx;
|
| }
|
|
|
| public void ejbRemove(){}
|
| public void ejbActivate(){}
|
| public void ejbPassivate(){}
|
| public void setSessionContext(){}
|
| public HelloBean(){}
|
| }
|
|
|
Deploying Your EJB
Firstly you will have to compile each of the classes:
javac -classpath %J2EE_HOME%\lib\j2ee.jar <classname.java>
Depending on how you work, you may need to add the
directory to which the other classes have been compiled to the classpath above.
Once again you will need to run Application Deployment Tool, then create a new
application as we did for JSPTest and ServletTest previously, this time call it
EJBTest (imaginative aren’t I?).
So as before create a new application using the deploytool,
I’ve called mine HelloApp. The select File -> New Enterprise Bean as shown
below:
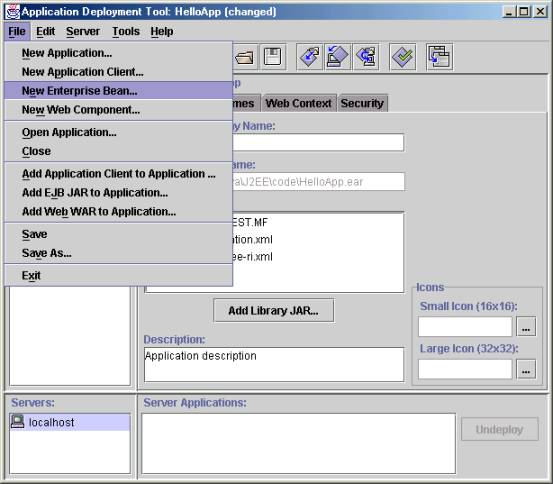
Figure 4 – New Enterprise Bean>
Then hit the Next button on the info screen that is
displayed, on the next screen set the JAR display name to HelloJar, and add the
files Hello.class, HelloHome.class, and HelloBean.class to the Contents. Then
hit Next. On this screen you need to set the Enterprise Bean Class to HelloBean,
the Home Interface to HelloHome, and the Remote Interface to Hello, and make
sure the Bean Type is set to Session, Stateless. Then set the Enterprise Bean
Display Name to HelloBean, and click Next, and Next again, in the EJB reference
in Code add a row with the following entries:
|
Coded Name:
|
jb/HelloBean
|
|
Type:
|
Session
|
|
Home:
|
HelloHome
|
|
Remote:
|
Hello
|
The click Finish. Next select the JNDI Tab, and set the
JNDI Name to HelloBean.
You are now ready to deploy it, so select Deploy
Application from the Tools menu, and this time check the Return Client Jar
checkbox (and select a suitable path). Then hit Next twice and then Finish.
The EJB Client
|
|
|
import javax.rmi.*;
|
|
import javax.ejb.*;
|
|
import javax.naming.*;
|
|
|
| public class HelloClient
|
| {
|
| public static void main(String[] args)
|
| {
|
| Context context;
|
| HelloHome home;
|
|
|
| try
|
| {
|
| context = new InitialContext();
|
| try
|
| {
|
| Object obj = context.lookup("HelloBean");
|
| try
|
| {
|
| home = (HelloHome) PortableRemoteObject.narrow(obj, HelloHome.class);
|
| Hello bean = home.create();
|
| System.out.println(bean.greet("World"));
|
| }
|
| catch (Exception e)
|
| {
|
| System.out.println("Exception:" + e);
|
| }
|
| }
|
| catch (Exception e)
|
| {
|
| System.out.println("Can't look up HelloBean." + e);
|
| }
|
| }
|
| catch(NamingException e)
|
| {
|
| System.out.println("Can't get context.");
|
| }
|
| }
|
| }
|
|
|
You can now compile the above client using:
| javac -classpath %J2EE_HOME%\lib\j2ee.jar;. HelloClient.java
|
Then run it using:
| java -classpath %J2EE_HOME%\lib\j2ee.jar;.\HelloAppClient.jar;. HelloClient
|
You should then see: Hello World on your screen.
Congratulations, you’ve written and deployed an example of each important bit of the Java 2 Enterprise Edition!
Finally, the code and an electronic copy of this article are available from http://www.crickett.co.uk/articles/java/j2ee/intro.zip
References
In addition to the URLs mentioned above (on which the majority of this article is based), the reader may also wish to consider the following books, reviews of which can be found on the ACCU web site (www.accu.org).
- Enterprise JavaBeans, Second Edition by Richard Monson-Haefel
- Java Servlet Programming by Jason Hunter, William Crawford
- Developing Java Beans by Robert Englander
- JavaServer Pages by Hans Bergsten
N.B. I don’t work for O’Reilly, I just like the layout and quality of their Java books.
|